In Collection
#304
Seen It:
Yes
USA / English
| Yun-Fat Chow |
Monk With No Name |
| Marcus J. Pirae |
Mr. Funktastic |
| Karel Roden |
Strucker |
| Victoria Smurfit |
Nina |
| Seann William Scott |
Kar |
| Jaime King |
Jade / Bad Girl |
| Roger Yuan |
Master Monk |
| Chris Collins |
Sax |
| Sean Bell |
Diesel |
| Kishaya Dudley |
DV |
| Rob Archer |
Buzz |
| Mauricio Rodas |
Wicho |
| Bayo Akinfemi |
Shade |
| Russell Yuen |
Brother Tenzin |
| Director |
Paul Hunter |
| Producer |
Charles Roven; John Woo |
| Writer |
Ethan Reiff; Cyrus Voris |
| Cinematography |
Stefan Czapsky |
| Musician |
Eric Serra |
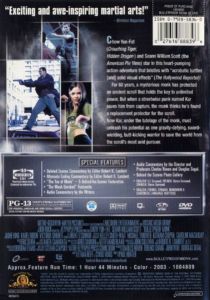
Bulletproof Monk brings traditional martial art into New York City where the current guardian Monk (Chow Yun Fat) of a powerful ancient scroll is looking for his successor. Surprised and full of doubt, he has found his successor Kar (Seann William Scott) who is a charming pickpocket and does not take anything seriously. Running out of time as Monk gets weaker, he and Kar learn and teach from each other while being chased by long time power-monger. Only at the end will you find out who the real successor is and how the mankind is once again, saved. Comical but still have martial art stunts, this movie will bring suspense and joy to the audience.
| Distributor |
MGM Home Entertainment |
| Edition |
Special Edition |
| Barcode |
027616888396 |
| Region |
Region 1 |
| Release Date |
9/9/2003 |
| Packaging |
Keep Case |
| Screen Ratio |
Theatrical Widescreen (2.35:1) |
| Subtitles |
English; French; Spanish; Cantonese; English (Closed Captioned); Mandarin |
| Audio Tracks |
Dolby Digital 5.1 [English]
Dolby Digital 5.1 [French]
Dolby Digital Surround [French]
Dolby Digital Surround [Spanish] |
| Layers |
Single Side, Single Layer |
| No. of Disks/Tapes |
1 |
|
Deleted Scenes Commentary by Editor Robert K. Lambert Alternate Ending Commentary by Editor Robert K. Lambert "The Tao of Monk" - 5 Behind-the-Scenes Featurettes "The Monk Unrobed" Featurette Audio Commentary by the Writers Audio Commentary by the Director and Producers Charles Roven and Douglas Segal Behind the Scenes Photo Gallery |
|
|